⚙️ Tech Breakdown: Third Person Cameras in Games
Experience has made me opinionated about implementing 3rd person cameras. People naturally, but naively, think about the camera as a second actor in the world, following the player around (like Lakitu in Super Mario 64).
Lets discuss an alternative perspective, where you consider instead the player on the 2D picture plane (with code!).
We can rebuild him. We have the technology.
A big shoutout here in the jump to the work of John Nesky and Mark Haigh-Hutchinson in contributing to my understanding of “gamatography.”
So first off, let’s state clearly what the goals of a 3rd person camera system ought to be, as plainly as we can:
- We want to place the player on the screen.
- We want to control how much of the screen is covered by the player.
- We want interactive control over the view direction.
Let’s make these into parameters that our code can script.
The following code samples will use Unity’s C# API for reference, but these methods are pretty generic and portable to any 3D environment. All you need to do is make sure you can write to the camera’s position and rotation.
struct CameraParams {
    public Vector3 trackingPosition;    // 3D world position of the player
    public Vector2 framing;             // 2D screen position of the player
    public float distance;              // offset between the camera and the player
    public float pitch;                 // vertical camera tilt
    public float yaw;                   // horizontal camera pan
}
The Tracking Position will come from the game – typically you just take the player position and possibly apply a low-pass filter or critically-damped spring to smooth out little bumps.
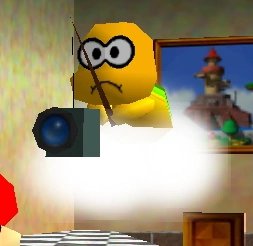
You can also get pretty sophisticated with it. On Solar Ash we projected the player position onto the ground, so that the camera wouldn’t “track” jumps, and only applied vertical smoothing to clean up uneven terrain, but no horizontal smoothing which would cause the camera to lag as Rei zipped around at 45MPH.

The green line here shows the tracking position.
Framing is a 2D value in “Viewport Coordinates” where (-1,-1) is the bottom left corner of the screen, (1,1) is the top-right corner of the screen, and (0,0) is the middle of the screen. This tells us where to place the tracking position on the picture plane explicitly.
For a platformer, you probably want to be bottom-third when looking horizontally, center when looking-down on the player, and bottom-center when looking-up (possibly biassed a bit horizontally for an “over the shoulder” feel).
In Tiny Starpilot I actually counter-frame the player and the reticle. When you’re aiming to the right, the player is framed on the left and vice-versa. This creates a more dynamic feel and also gives more screen-space to see what you’re shooting.
Really pushing how much I can get stub in with just spheres. #gamedev #screenshotsaturday pic.twitter.com/TsN2PJjsvN
— Max! (@xewlupus) January 8, 2023
Distance is just the world-space distance from the player to the camera. Pretty normal platformer logic is to come in close when looking up and pull far out when looking down. You also might pull out for action scenes but pull in for narrative scenes to draw peoples attention (you can also do that with field-of-view, but it’ll make people sick 🤮).
Lastly, Pitch and Yaw are the Spherical Coordinates of your viewing direction. In an Orbit Camera, you can just drive these from the right-stick or the mouse-delta, making sure to clamp the pitch and wrap-around the yaw.
One advanced technique is to consider the vertical component of the cross-product between the view-direction and player-velocity. Scaling and adding this into yaw simulates a “leash” effect.
So how do we convert these parameters to the camera position/rotation? Math!
static void SetParams(this Camera camera, in CameraParams camParams) {
	// compute "local" offset relative to our view rotation
    var tanFOVY = Mathf.Tan(0.5f * Mathf.Deg2Rad * camera.fieldOfView);
    var tanFOVX = tanFOVY * camera.aspect;
    var localOffset = new Vector3(
    	camParams.distance * tanFOVX * camParams.framing.x,
    	camParams.distance * tanFOVY * camParams.framing.y,
    	camParams.distance
    );

    // compute position and rotation
    var rotation = Quaternion.Euler(camParams.pitch, camParams.yaw, 0);
    var position = trackingPosition - rotation * localOffset;
    camera.transform.SetPositionAndRotation(position, rotation);
}
Implemented as an Extension Method for UnityEngine.Camera, as a flex.
I’ll leave puzzling out the trigonometry as a exercise to the reader, but notice how we consider the field-of-view and aspect-ratio of the camera to correctly convert the viewport coordinates into a world-space parallax offset.
In addition to being a more natural parameter-space to script gameplay with, these inputs also form a better blending space for seamlessly moving the camera from one tracking-target to another. If you just Lerp() the position and rotation you have no guarentee that the tracking position will stay on screen, or that the horizon will stay flat.
The key insight here is that, given a camera and a tracking-position we can inverse-compute the camera parameters, then the save the difference (or delta) between the two parameter spaces, which we then add to our current inputs, but blend-out over time. That way the interpolation is in our intuitive picture-plane space.
static void GetParams(
	this Camera camera,
	out CameraParams result,
	in Vector3 trackingPosition
) {
	var position = camera.transform.position;
	var rotation = camera.transform.rotation;

	// tracking position
	result.trackingPosition = trackingPosition;

	// pitch/yaw
	Vector3 eulerAngles = rotation.eulerAngles;
	result.pitch = eulerAngles.x;
	result.yaw = eulerAngles.y;

	// distance
	var toTrackingOff = trackingPosition - position;
	var fwd = rotation * Vector3.forward;
	result.distance = Vector3.Dot(toTrackingOff, fwd);

	// framing
	var toCameraOff = position - trackingPosition;
	var parallax = Quaternion.Inverse(rotation) * toCameraOff;
	var tanFOVY = Mathf.Tan(0.5f * Mathf.Deg2Rad * camera.fieldOfView);
	var tanFOVX = tanFOVY * camera.aspect;
	var screenToWorld = result.distance * new Vector2(tanFOVX, tanFOVY);
	result.framing.x = -parallax.x / screenToWorld.x;
	result.framing.y = -parallax.y / screenToWorld.y;
}
A little more verbose, but not too bad.
With this in hand, we can now write the orbit camera blendout:
struct CameraBlend {
	public Vector2 framing;
	public float pitch;
	public float yaw;
	public float distance;
}

static void ComputeBlendout(
	this Camera camera,
	out CameraBlend result,
	in CameraParams newParams,
) {
	camera.GetParams(out var oldParams, in newParams.trackingPosition);

	// offset from the new target to the current view
	result.framing = oldParams.framing - newParams.framing;
	result.pitch = oldParams.pitch - newParams.pitch;
	result.yaw = oldParams.yaw - newParams.yaw;
	result.distance = oldParams.distance - newParams.distance;

	// yaw can wrap-around
	if (result.yaw > 180f) { result.yaw -= 360f; }
	else if (result.yaw < -180f) { result.yaw += 360f; }
}

static void SetParamsBlended(
	this Camera camera,
	in CameraParams camParams,
	in CameraBlend blendout,
	float progress
) {
	var multi = 1f - Mathf.Clamp01(progress);

	var result = camParams;
	result.framing += multi * blendout.framing;
	result.pitch += multi * blendout.pitch;
	result.yaw += multi * blendout.yaw;
	result.distance += multi * blendout.distance;

	camera.SetParams(in result);
}
Notice how we don’t need to adjust the tracking position – we’re entirely blending in the picture-plane now, so everything stays in view.
This article has gone long, so I’ll wrap it up. But just to leave you with some last widsom: understanding these algorithms is the first-step towards extending them. Placing Solar Ash’s camera on a firm foundation eased developing more complex picture-plane oriented tasks, like making line-of-sight collisions less disorienting, changing gravity, or my personal favorite: positioning two heads balanced in a box nicely for dialog.
A little mathematical flexing from #SolarAsh preproduction that I was pretty proud of: a method for positioning a camera -- given two heads and a not-blocked-by-UI viewport subregion -- that's balanced for an player-controlled view rotation. #gamedev pic.twitter.com/KXlwisvu2x
— Max! (@xewlupus) December 21, 2021